My family was so delighted to color eggs earlier this week, we willingly shared some and gobbled some with the aim of doing it one more time.
Keeping blog opportunities in mind, I had the presence of mind to document the process. Some of the pics are from my cell. Some are from my digital camera. Hopefully the photos will do the task justice!
One tip in storing these eggs: I used a carton for the first batch and noted that condensation had a watercolor-type effect on the bottoms of the eggs. So, make two KEY MENTAL NOTES! First, with this second batch, I put a couple napkins in the foam egg carton to prevent condensation. Second, it's safe to assume that some discernment is in order as to whether or not you'd want to be hiding these eggs around the house on fabric-covered items. Just sayin'. Consider yourself WARNED. :D
 |
| Gel dye from Sweet Art Country Kitchen. Visit them here |
 |
| Here I have a small coffee cup with 1 T white vinegar |
|
 |
| I use the blunt end of a wood skewer to add a dollop of dye |
 |
| I use the skewer to dilute the gel as much as possible |
 |
| Here I have done all five colors of dye, plus my own mix for orange |
 |
| I add enough boiling water to make sure the eggs will be covered |
 |
| Finishing adding the boiling water |
 |
| Our work area: the dining table with an old shower curtain topped with an old scrap towel. You can see the remains of our previous egg-dying extravaganza... |
 |
| This egg was just dipped in and then immediately removed. See the potential? |
 |
| The same egg after two minutes in the dye bath. So cheery! |
 |
| Red, after 2 minutes |
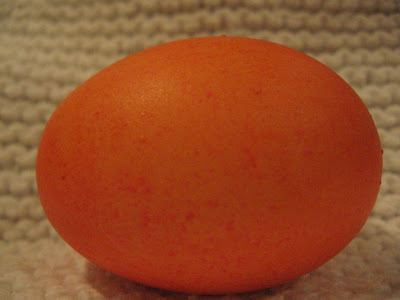 |
| Orange, after 2 minutes |
 |
| Yellow, after 2 minutes |
 |
| Teal Green, after 2 minutes |
|
 |
| Blue, after 2 minutes |
 |
| BLACK, after 2 minutes |
 |
| A wonderful rainbow... |
 |
| .....filled with cheer! |
 |
| The beautiful back of that egg dyed in the BLACK dye bath. Again, happy dyeing! |


No comments:
Post a Comment